Attaching a device to a SeaSucker Vacuum Mount
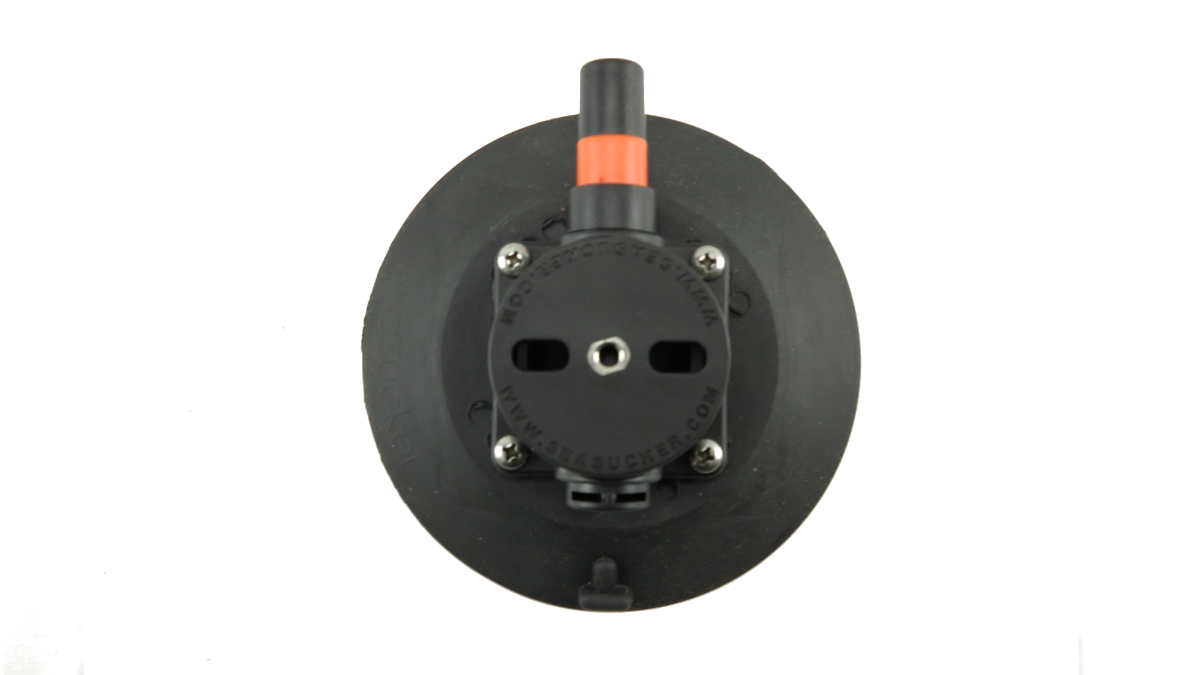
SeaSucker Vacuum Mounts are unique. Aattaching a device to a SeaSucker Vacuum Mount is very easy. This is due to the design of the Vacuum Mount Housing. It provides two methods to mount your favourite device.
This product guide will focus on using the Housing Top Slots. The Vacuum Mount housing is the same on the 114 mm (4.5") and 152 mm (6") Vacuum Mounts. The Top Slots are 14 mm wide by 7 mm high. We use 1/4-20 bolts as they fit nicely into the slots and provide a very secure connection.
In this product guide we will secure a 510 mm Aluminium Track to a SeaSucker 152 mm Black Vacuum Mount. If the device you are mounting will be used outdoors, we recommend using 304 or 316 Stainless Steel nuts, bolts and washers. Also, we use Nyloc nuts as they ensure the nut can't come loose during normal operation. The parts used in this guide are
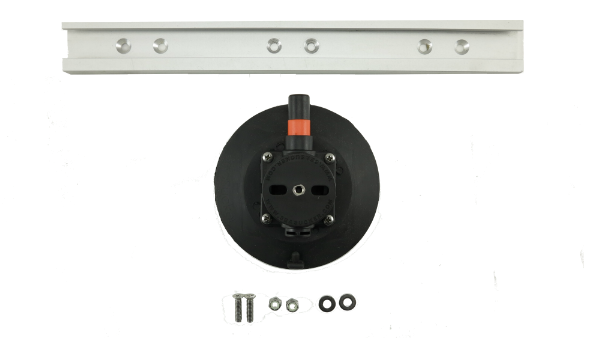
- 1 x 152 mm SeaSucker Black Vacuum Mount
- 1 x 510 mm Aluminium Track
- 2 x 1/4-20 Countersunk Stainless-Steel Bolts
- 2 x Stainless Steel Nyloc Nuts
- 2 x Stainless Steel Washers
Step 1 – Removing the Housing
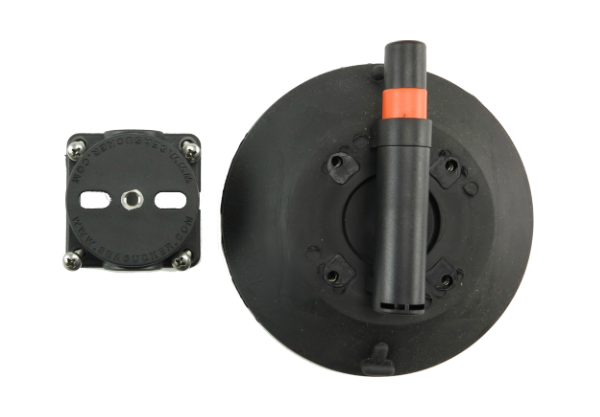
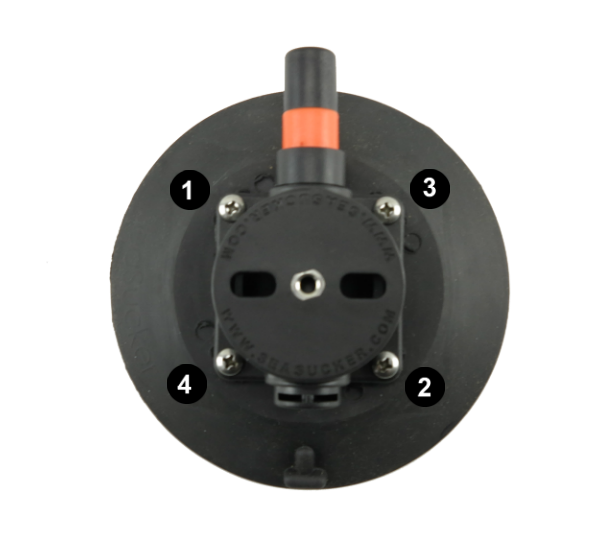
To remove the Vacuum Mount housing unscrew the 4 housing screws as shown below. Once the housing bolts are removed the housing can be easily separated from the Vacuum Pad as per below.
Step 2 – Bolting the Device to the Vacuum Mount Housing
There are two methods that can be used, the stainless-steel centre thread and the top slots.
Using the Stainless-Steel Centre Thread
The centre thread is used for light to medium duty applications. Using just the centre thread also means the device may come loose as there is nothing to stop it from rotating.
Please Note: If you decide to use the centre thread you MUST ensure the length of the bolts do NOT protrude through the bottom of the housing. Underneath the housing sits the Vacuum Pump, if the bolt used is it too long it may damage the Vacuum Pump when you tighten the bolt.
Using the Housing Top Slots
By far the most secure method is using the Housing Top Slots. The slots are a unique SeaSucker feature. The top slots sit well clear of the Vacuum Pump. Therefore, if the bolts used are long they won’t interfere or damage the Vacuum Pump. Furthermore, by using two bolts to secure your device it ensures the device can't rotate loose during normal operation.
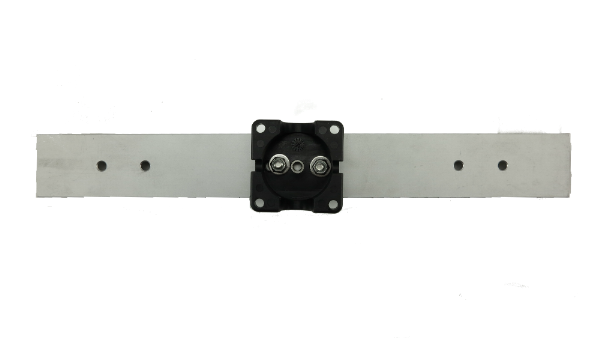
Bolting the 510 mm aluminium track onto the Housing is straight forward. Insert the bolts through the Aluminium Track and the Housing, insert the stainless-steel washer and insert and tighten the stainless-steel Nyloc Nut.
Before tightening up the Nyloc nuts pay attention to the alignment of Housing with the Aluminium Track. This can be done by laying the Aluminium Track on a flat and level surface. Using a Spirit Level, check the Housing is also level with the Aluminium Track. Once this is done tighten both bolts.
Step 3 – Putting it back together
In most cases this step is the same as Step 1 in reverse. Having said this there is one situation that might cause an issue.
Attaching a device that is wider than the Vacuum Mount Housing
This happens when the device you are mounting is wider than the width of the Housing. When this occurs, you will lose access to the Housing Bolts using a Phillips Head Screw Driver. When this occurs, we switch over and use Housing Screws with Hexagonal Heads. This is available through our online store. This enables you to tighten the bolts using a spanner.
With respect the Aluminium Track we used the standard housing bolts. First, insert the housing onto the Vacuum Pad then re-insert the Housing Blots. Tighten the bolts in a diagonal format as shown below.
You are finished. The device is now secured to the Vacuum Mount and is ready for use.


